Oh No! My String Needs Replacing!

One of the trickiest things about being a string player is having to deal with strings. Choosing the right brand and type of string, replacing strings, tuning strings, breaking strings- it’s never ending!
Strings on stringed instruments like violins, violas, cellos, and double basses need to be changed periodically for several reasons.
Wear and Tear: Strings are under constant tension and are subject to wear and tear from the friction against the bow hair and the fingerboard. Over time, the strings can lose their clarity, responsiveness, and tone due to this wear.
Tone Quality: As strings age, they can lose their vibrant and resonant tone. The sound may become dull or lifeless, affecting the overall quality of the music produced by the instrument.
Pitch Stability: Older strings are more likely to go out of tune frequently, as they can lose their ability to hold tension steadily. This can be frustrating for the musician during practice or performance.
Playability: New strings are typically more responsive and easier to play, allowing the musician to produce a better sound and execute techniques with greater ease.
Breakage: Strings can break due to various factors, such as excessive tension, corrosion, or accidental damage. Replacing a broken string is essential to continue playing the instrument.
Before Changing a String
There are a few important things to note before you embark upon your string change attempt.
Double check the new string you are about to put on the instrument. If you’re attempting to fit the wrong size (e.g. 3/4 instead of 4/4) or wrong note string (e.g. an ‘A’ string instead of a ‘D’ string), you will have no luck reaching the desired pitch you’re after! You may also find that the string physically does not reach both the tailpiece and the peg. Just double checking the package of the string before you attempt to fit it onto your instrument can save you much hassle down the track.
Only ever change one string at a time. If you need to replace a whole set of strings, taking all the strings off and then refitting an entirely new set will cause a host of issues. Firstly, the bridge will have to be refitted in the absence of strings keeping it on the instrument. This can be a hassle and may lead to errors in bridge installation.
Furthermore, the sound post may fall if all strings are removed at once. This small length of wood sits between the top plate and back plate. The sound post helps transfer vibrations between the two plates and provides structural integrity to the instrument. A fallen or missing soundpost will result in the instrument having a thin, less vibrant sound, and is usually detected by ‘rattling around’ the interior. The sound post provides structural support to the whole instrument. Without the sound post in place, the instrument risks sustaining structural damage. It is important that if a sound post falls or is lost, you have a luthier or string technician rectify this straight away.
Instead, try changing one string at a time to keep the bridge and soundpost in place.
New strings will take a while to settle in.
Violin, viola, cello, and double bass strings typically need to be played or “broken in” before they reach their optimal tone and stability. When you install new strings on a string instrment, they are often bright, metallic-sounding, and may not hold their tuning well. Breaking in the strings over a couple of days helps them settle and reach their full potential. For this reason, it’s generally not the best idea to change strings the day before a concert or performance.

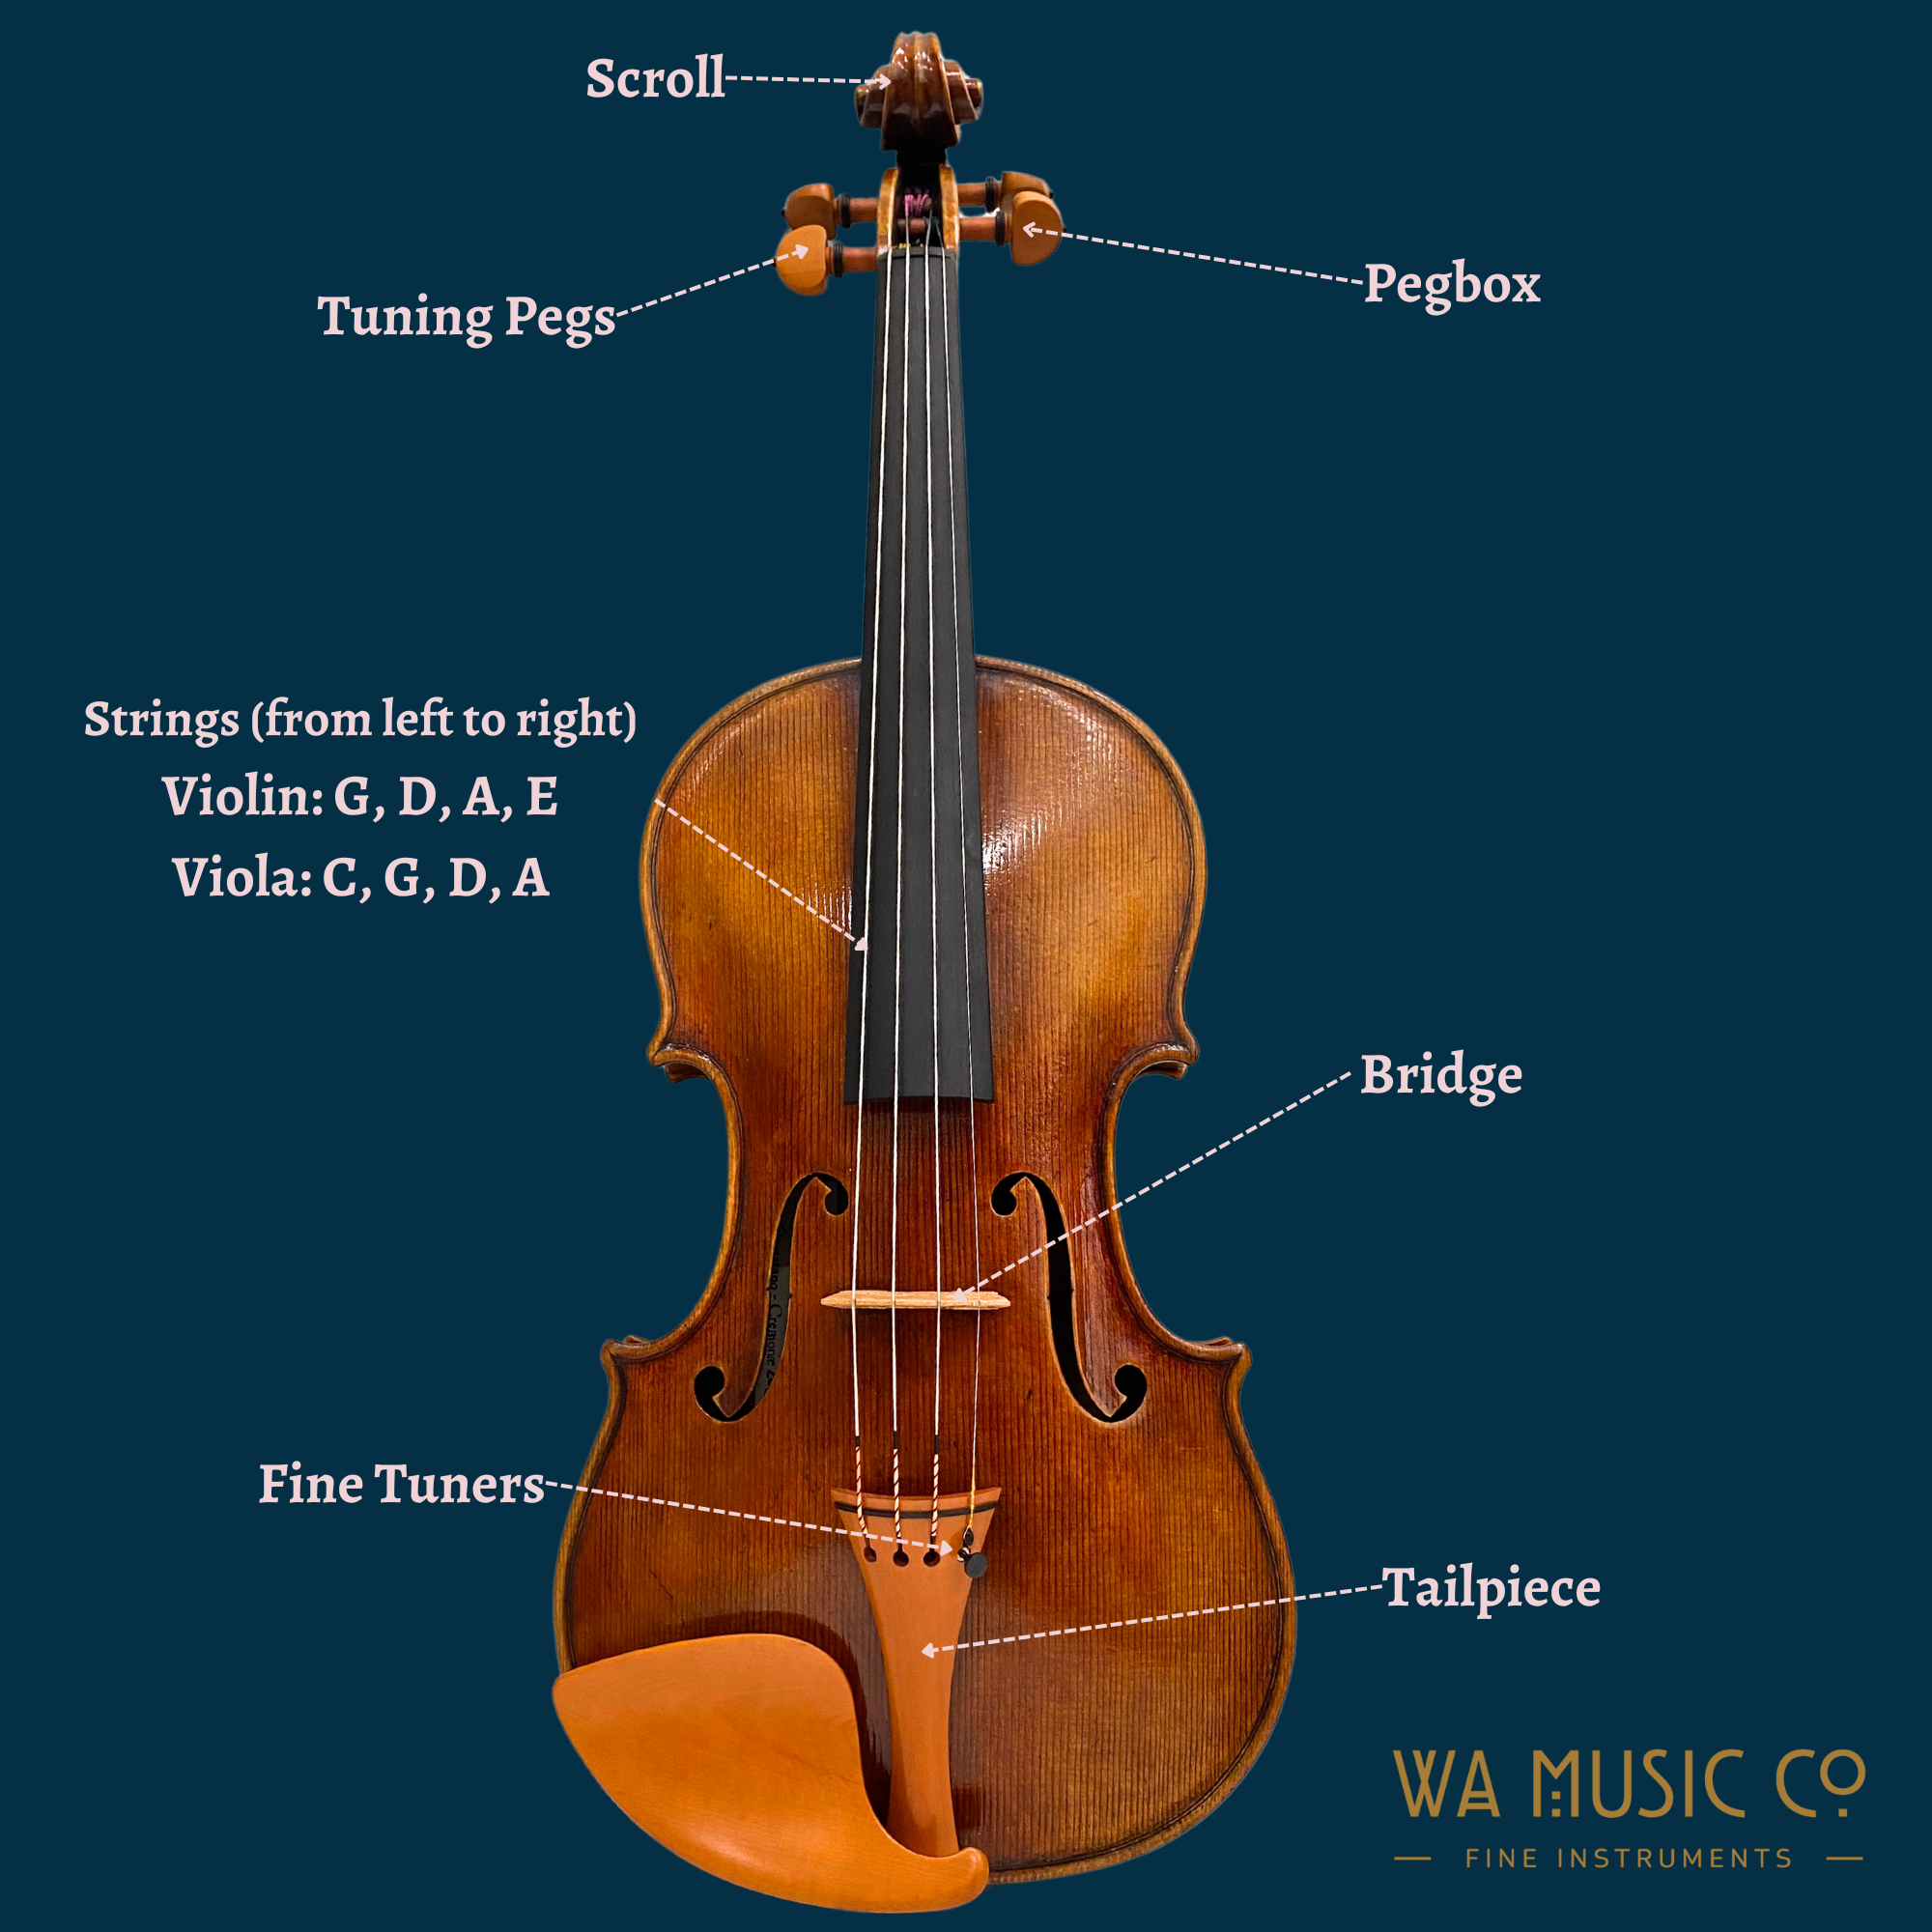
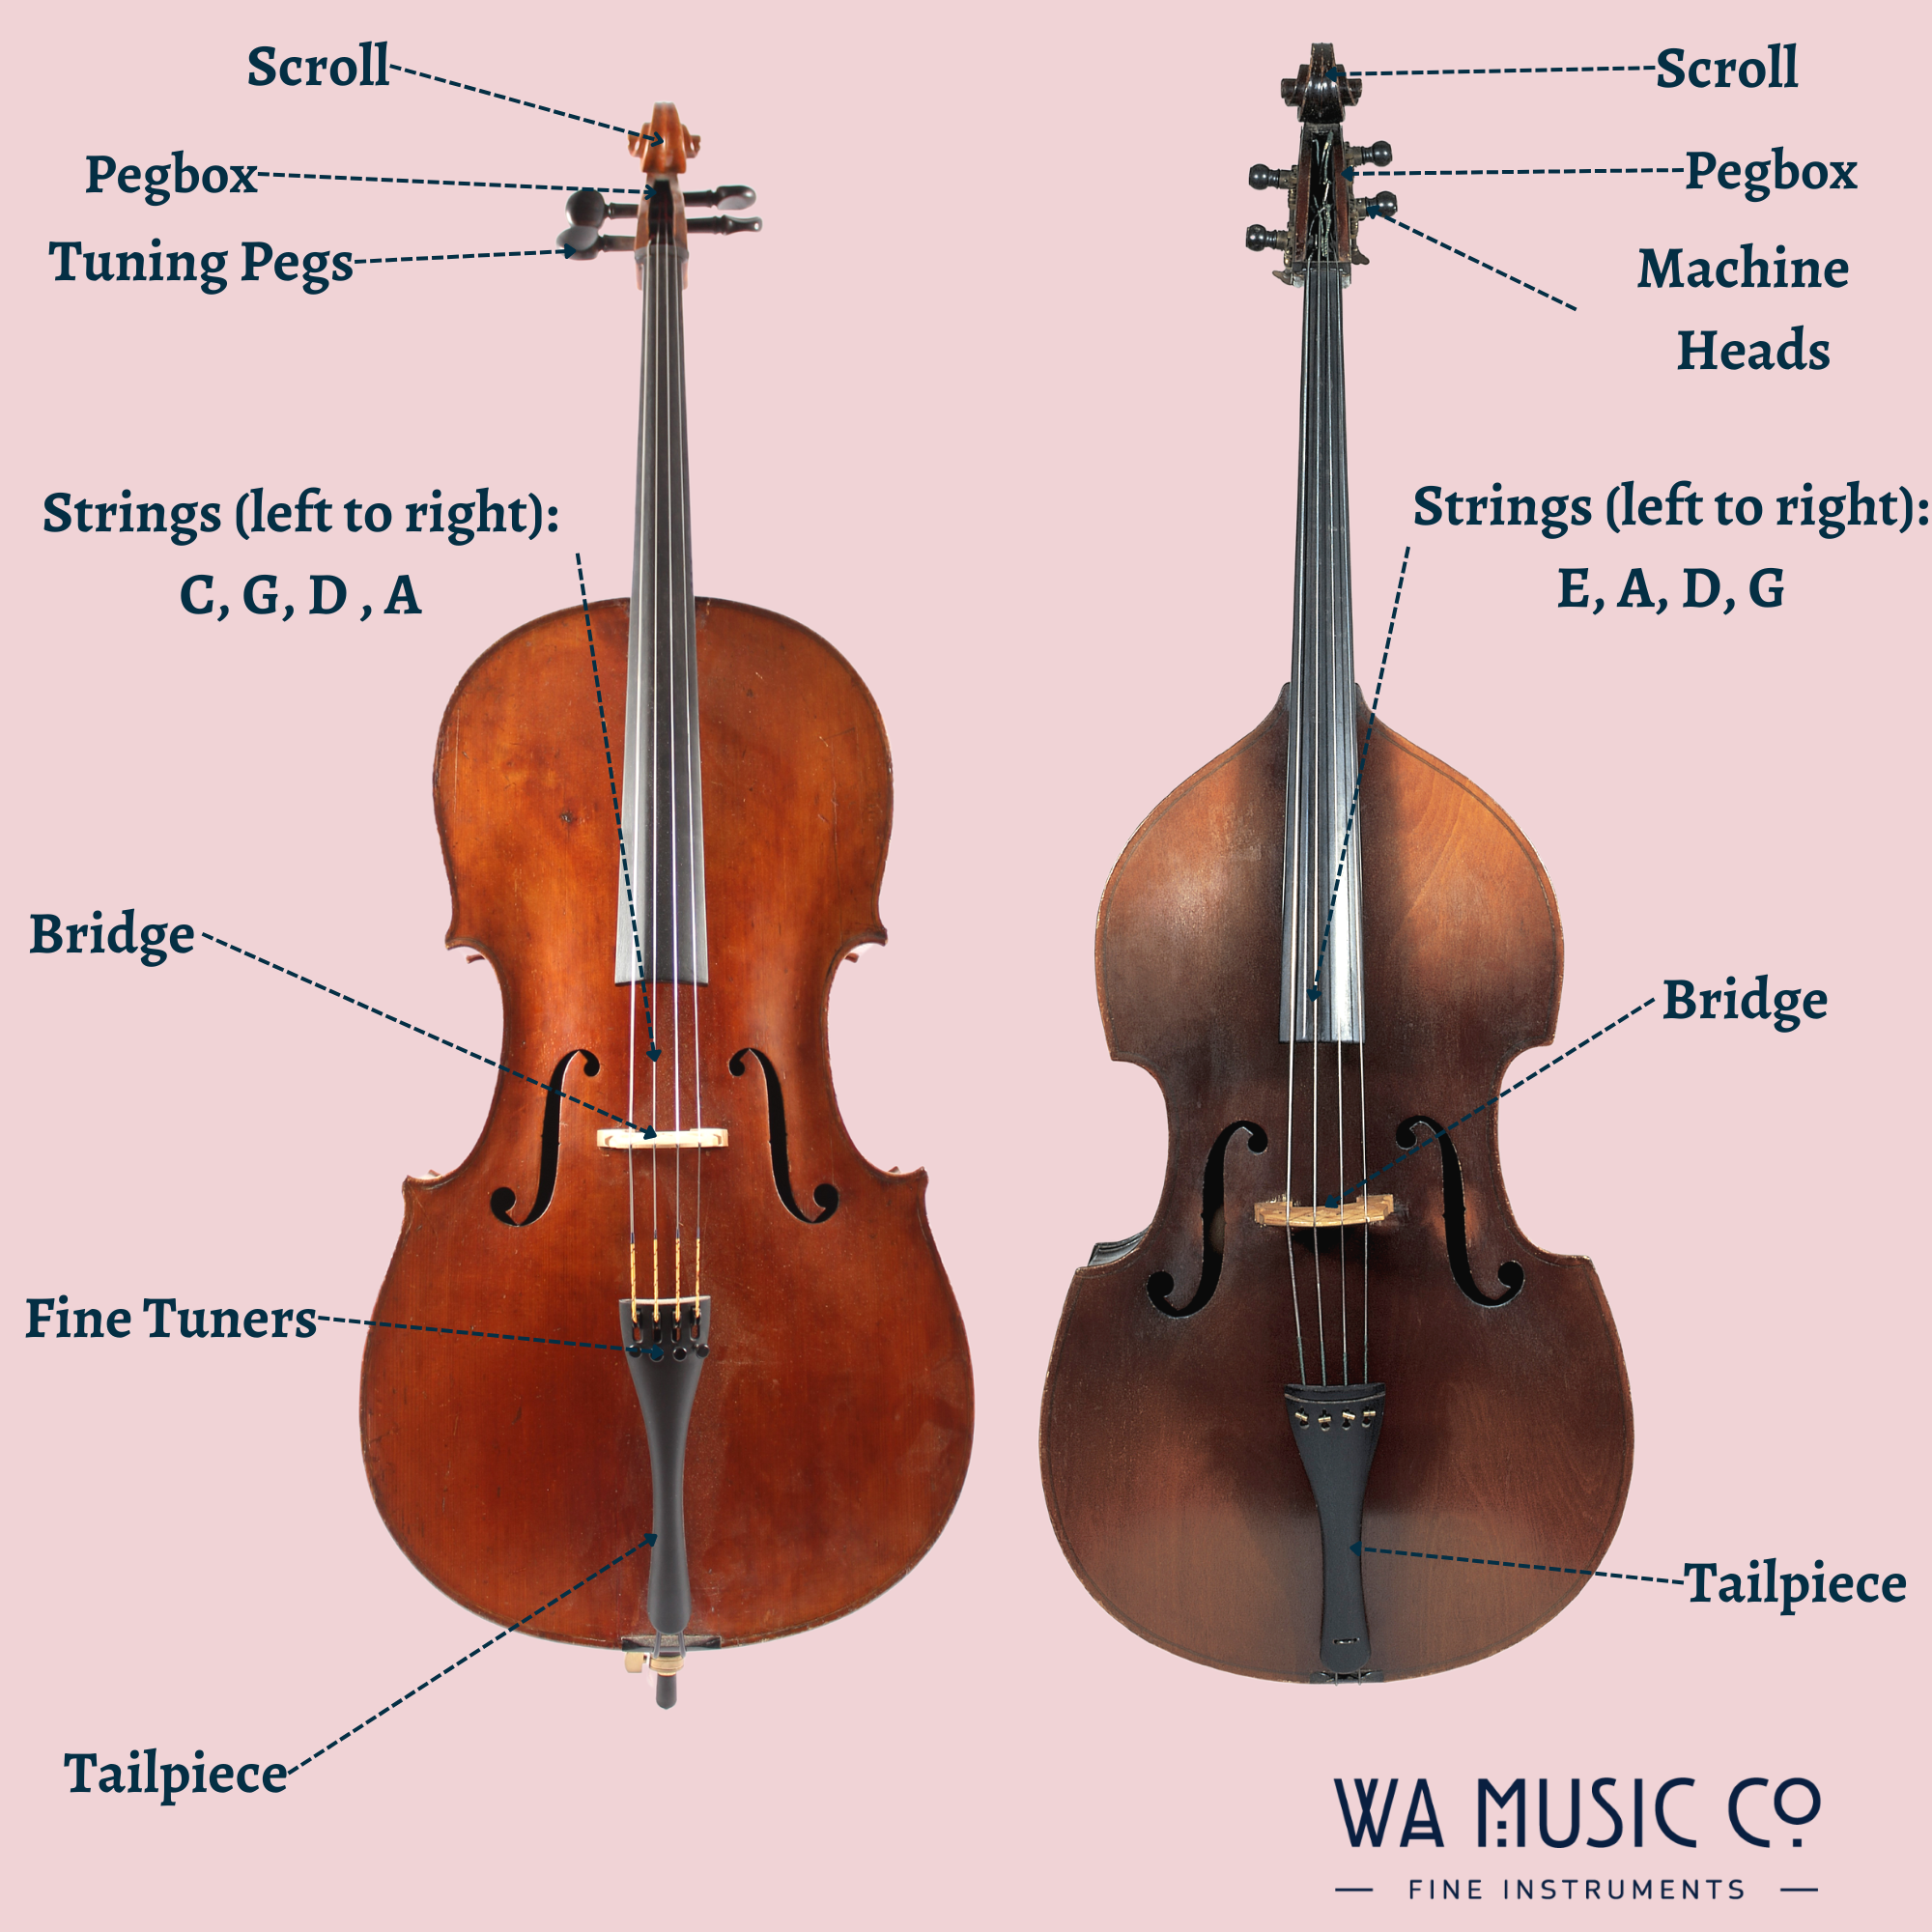
A Quick Refresher On String Instrument Parts:


How To Change A String
Lay your instrument on a flat surface with a cloth or towel underneath to protect the varnish or wood. Alternatively, you can rest your instrument in on a violin/viola stand or cello/bass stand to increase stability.
Start by removing the string you wish to replace. Unwind the peg ‘towards you’ (or in a counterclockwise motion) to release the tension of the string. When the string is lax enough, you can remove the end of the string (generally the ‘ball end’, but sometimes also a ‘loop’) from the tailpiece at the bottom of the instrument.
Unpackage the string you wish to fit onto your instrument and unwind the coil. Locate the ‘peg end’ of the string. This is generally the end of the string with an inch or so of colour and no ball/loop at the tip. Depending on which brand of string you are using, this coloured end will correspond to a particular open string, and can be used to differentiate between other strings of the same set.
Twist the unstrung peg until you can see the holes through which the string will be threaded. Carefully thread the string through the hole and twist the peg ‘away’ from you (or in a clock-wise motion), pushing the peg into the pegbox as you twist.

When there is the slightest amount of string sticking up from the upper hole, begin winding the peg in a clockwise motion. As you do, pull the string to the side towards the middle of the pegbox (i.e. to the ‘left’ if you’re changing one of the higher two strings, or the ‘right’ if you’re changing one of the lower two.) This lets the string coil on the opposite side of the peg holes and creates more space on the side of the peg towards the edge of the pegbox. As you wind the string, cross the string over towards the other side of the peg holes so you can create a nice, neat coiling pattern.


Once you have wound the string a few times, insert the other end of the string (the ‘ball’ or ‘loop’ end) into the tailpiece. The important thing to note here is that the loop or ball needs to ‘catch’ on the small groove in the underside of the tailpiece. This helps to make sure it stays in place. Depending on the size of this groove, you may be able to position the end of the string in the correct position yourself. If not, you may need a ballpoint pen or a similar non-sharp, slim object to help slot the ball in place.
Once the string is attached to both the tailpiece and the peg, it can be wound up further (with the peg) to increase string tension. Make sure the string sits in the groove of the nut under the pegbox. Also, make sure that the string also rests in the designated divot in the bridge. Some strings (E strings and A strings, most commonly) have small tubes of plastic designed to prevent the string from digging too far into the wood of the bridge. Be sure that this plastic tube is aligned with the bridge.
It is also helpful to keep the string under tension as you tighten the peg. This is to avoid the peg flying out of the fine tuner and/or tailpiece as you tune. While one hand twists the tuning peg, the other hand can lift the string to keep it taut.
Tune the newly-fitted string to the desired pitch. Be sure to monitor the position of the bridge during tuning as the increased tension of the string can pull the bridge forward. Be sure to tune with friction pegs using a ‘push in and twist up’ motion.

Bit Stuck? Get In Touch!
Changing strings can be a complicated and finicky process. If you are finding your particular strings, pegs, and tailpiece too difficult to approach restringing, that’s okay! We’d be more than happy to have our trained string technicians help you out with all of your restringing needs. Contact us as (08) 9244 9559 or sales@wamusic.com.au to make an appointment.

